Выбор иконки для категории
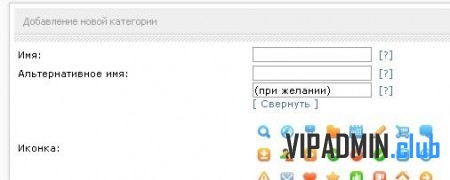
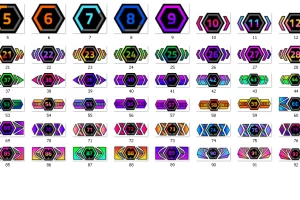
Небольшой Хак для редактора категорий. На этот раз - наглядный выбор иконки для категории вместо простого ввода ссыкли на иконку.
Для версий DataLife Engine: 7.5, 8.0, 8.2, 8.3
Итак, начинаем:
Открываем файл engine\skins\default.js и в начало файла вставляем:
function ShowOrHide2(d1) {
      if (d1 != '') DoDiv2(d1);
    }


    function DoDiv2(id) {
          var item = null;
          if (document.getElementById) {
            item = document.getElementById(id);
          } else if (document.all){
            item = document.all[id];
          } else if (document.layers){
            item = document.layers[id];
          }
          if (!item) {
          }
          else if (item.style) {
            if (item.style.display == "none"){ item.style.display = ""; }
            else {item.style.display = "none"; }
          }else{ item.visibility = "show"; }
    }

    function inserticon(a,b)
    {
    document.getElementById(b).value=a;
    $("#"+b).focus()
    }
2. Затем открываем файл engine\inc\categories.php
Ищем строку (по умолчанию строка #306):
<input class="edit" value="{$row['icon']}" type="text" name="cat_icon"><a href="#" class="hintanchor" onmouseover="showhint('{$lang[hint_caticon]}', this, event, '250px')">[?]</a>
Заменяем на:
<input class="edit" value="{$row['icon']}" type="text" name="cat_icon" id="cat_icon"><a href="#" class="hintanchor" onmouseover="showhint('{$lang[hint_caticon]}', this, event, '250px')">[?]</a>
        <br>
        <a href="jаvascript:ShowOrHide2('icolist');jаvascript:ShowOrHide2('title');jаvascript:ShowOrHide2('title2');"><div id="title">[ Выбрать значек ]</div><div id="title2" style="display:none;">[ Свернуть ]</div></a>
        <br/>$iconlist
Далее ищем строку (по умолчанию строка #483):
<input class="edit" onfocus="this.select()" value="$lang[cat_icon]" type="text" name="cat_icon"><a href="#" class="hintanchor" onmouseover="showhint('{$lang[hint_caticon]}', this, event, '250px')">[?]</a>
Заменяем на:
<input class="edit" onfocus="this.select()" value="$lang[cat_icon]" type="text" name="cat_icon" id="cat_icon"><a href="#" class="hintanchor" onmouseover="showhint('{$lang[hint_caticon]}', this, event, '250px')">[?]</a>
        <br>
        <a href="jаvascript:ShowOrHide2('icolist');jаvascript:ShowOrHide2('title');jаvascript:ShowOrHide2('title2');"><div id="title">[ Выбрать значек ]</div><div id="title2" style="display:none;">[ Свернуть ]</div></a>
        <br/>$iconlist
Ищем строку (по умолчанию строка #275):
$row['news_msort'] = makeDropDown( array ("" => $lang['sys_global'], "DESC" => $lang['opt_sys_mminus'], "ASC" => $lang['opt_sys_mplus'] ), "news_msort", $row['news_msort'] );
И после этой строки, вставляем код:
 $dir  = ROOT_DIR.'/uploads/icons';
    $columnsnum = 8;
    if ($handle = opendir($dir))
    {
        $i = 0;
        $iconlist = "<div id="icolist" style="display:none;"><table><tr>";
          while (false !== ($file = readdir($handle)))
           {
            if ($file != '.' and $file != '..' and $file != '.htaccess' and $file != 'Thumbs.db' and $file != 'system' and $file != 'index.html')
            {
                $ext = explode(".", $file);
                $icons = explode(",", $file);

                foreach($icons as $iconame)
                {
                    if(end($ext) == "gif" OR end($ext) == "png")
                    {
                    $i++; $iconame = trim($iconame);
                    $iconlist .= "<td align="center" style="padding:5px;"><img style="border: 0; cursor: pointer;" src="".$config['http_home_url']."uploads/icons/$iconame" alt="$iconame" onclick="inserticon('$config[http_home_url]uploads/icons/$iconame', 'cat_icon')" /></td>";
                    if ($i%$columnsnum == 0) $iconlist .= "</tr><tr>";
                    }
                }
            }
          }

          $iconlist .= "</tr></table></div>";

          closedir($handle);
     }
Затем Ищем строку (по умолчанию строка #481):
$skinlist = SelectSkin( '' );И после этой строки, вставляем код:
$dir  = ROOT_DIR.'/uploads/icons';
    $columnsnum = 8;
    if ($handle = opendir($dir))
    {
        $i = 0;
        $iconlist = "<div id="icolist" style="display:none;"><table><tr>";
          while (false !== ($file = readdir($handle)))
           {
            if ($file != '.' and $file != '..' and $file != '.htaccess' and $file != 'Thumbs.db' and $file != 'system' and $file != 'index.html')
            {
                $ext = explode(".", $file);
                $icons = explode(",", $file);

                foreach($icons as $iconame)
                {
                    if(end($ext) == "gif" OR end($ext) == "png")
                    {
                    $i++; $iconame = trim($iconame);
                    $iconlist .= "<td align="center" style="padding:5px;"><img style="border: 0; cursor: pointer;" src="".$config['http_home_url']."uploads/icons/$iconame" alt="$iconame" onclick="inserticon('$config[http_home_url]uploads/icons/$iconame', 'cat_icon')" /></td>";
                    if ($i%$columnsnum == 0) $iconlist .= "</tr><tr>";
                    }
                }
            }
          }

          $iconlist .= "</tr></table></div>";

          closedir($handle);
     }
Затем Ищем строку (по умолчанию строка #726):
echo "<img border=0 src="" . $cat_info[$id]['icon'] . "" height=40 width=40 alt="" . $cat_info[$id]['icon'] . "">";Заменяем на:
echo "<img border=0 src="" . $cat_info[$id]['icon'] . "" alt="" . $cat_info[$id]['icon'] . "">";Далее создаем каталог icons в папке uploads и загружаем туда нужные Вам иконки в форматах gif или png.
Готово! Вы также можете воспользоваться модифицированными(готовыми) файлами:
[attachment=3457]


